Hi, I’m Makoto, a freelance engineer.
When I first started to learn about Azure, I was worried about how much it would cost.
In reality, one of the great things about cloud services is that you can easily try and learn by starting a server for a short period of time and then stopping and deleting it when you’re no longer using it, at very little cost.
However, as you become more familiar with the operations, even if you think “I’ll delete it later,” it’s human nature to sometimes forget. Be sure to set up notifications so that you can quickly notice any unintended costs.
With that in mind, today I’m going to show you how to set up budget alerts.
If you want to learn how to cut costs in general, check out this article.

Let’s get started!
What are Budget Alerts?
By registering budget alerts, you can receive an email when your billing amount reaches a certain amount. This is similar to “Budgets” in AWS.
I recommend setting this up from the start to avoid high bills due to forgetting to delete created resources or pausing servers.
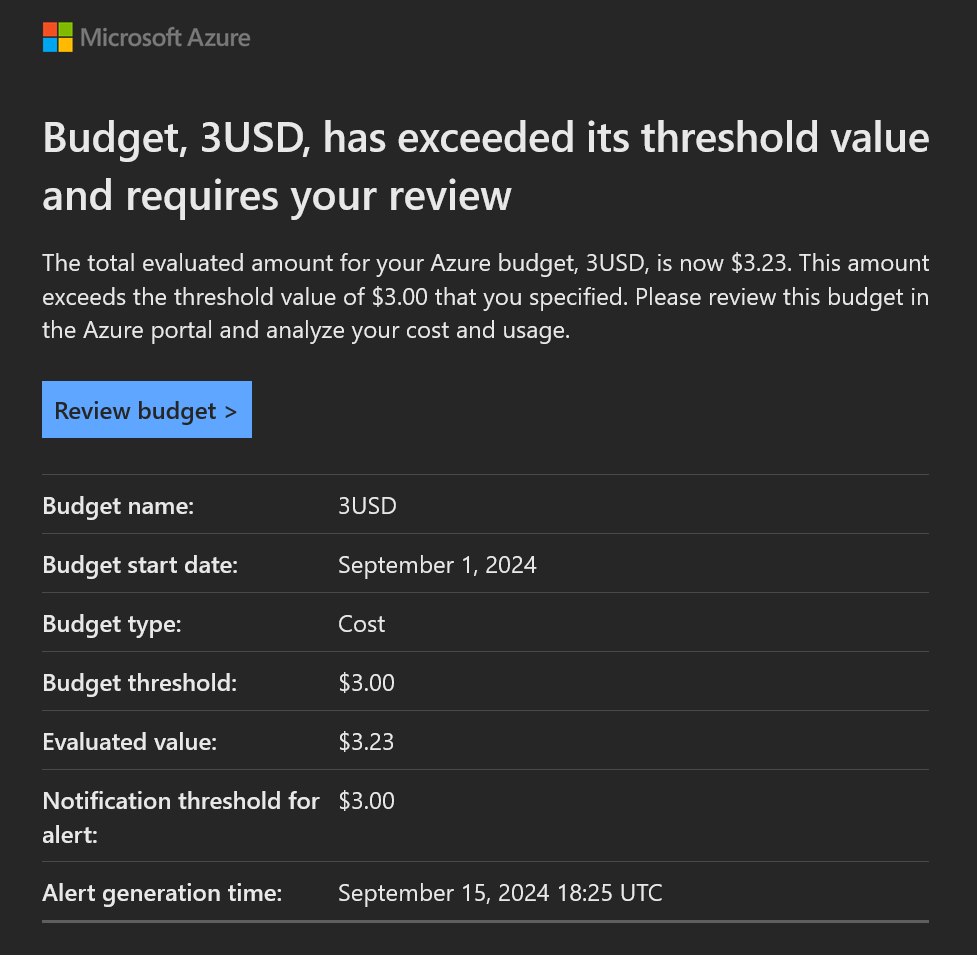
If you go over your budget limit, you’ll get an email like this:

How to Set Up Budget Alerts
From here, I’ll walk you through the actual setup process in a hands-on format. If you haven’t set it up yet, please follow along with the article.
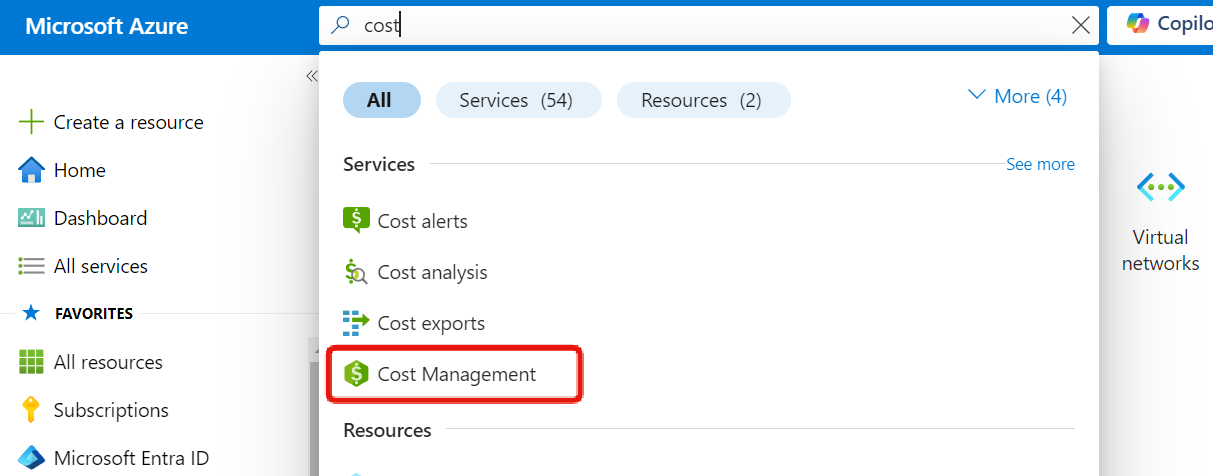
First, search for “Cost Management” and open it.

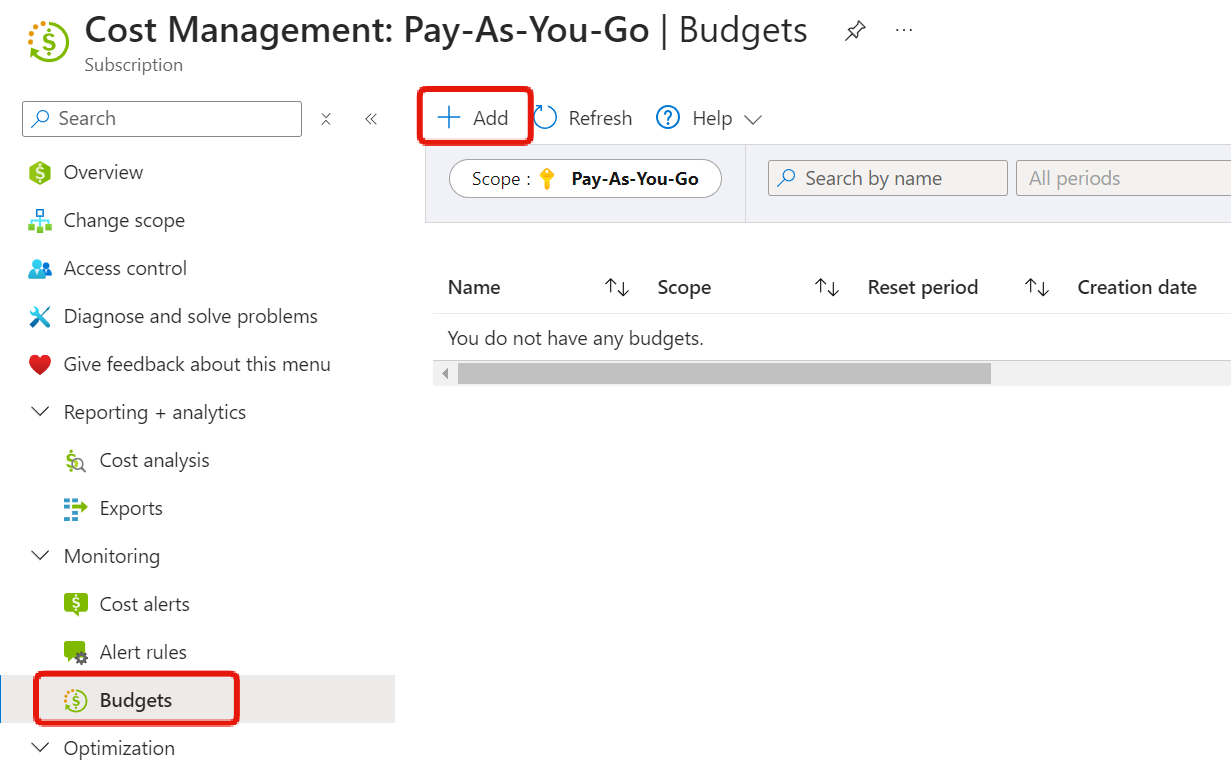
Select “Budgets” from the menu and click the “Add” button to register.

Creating a Budget
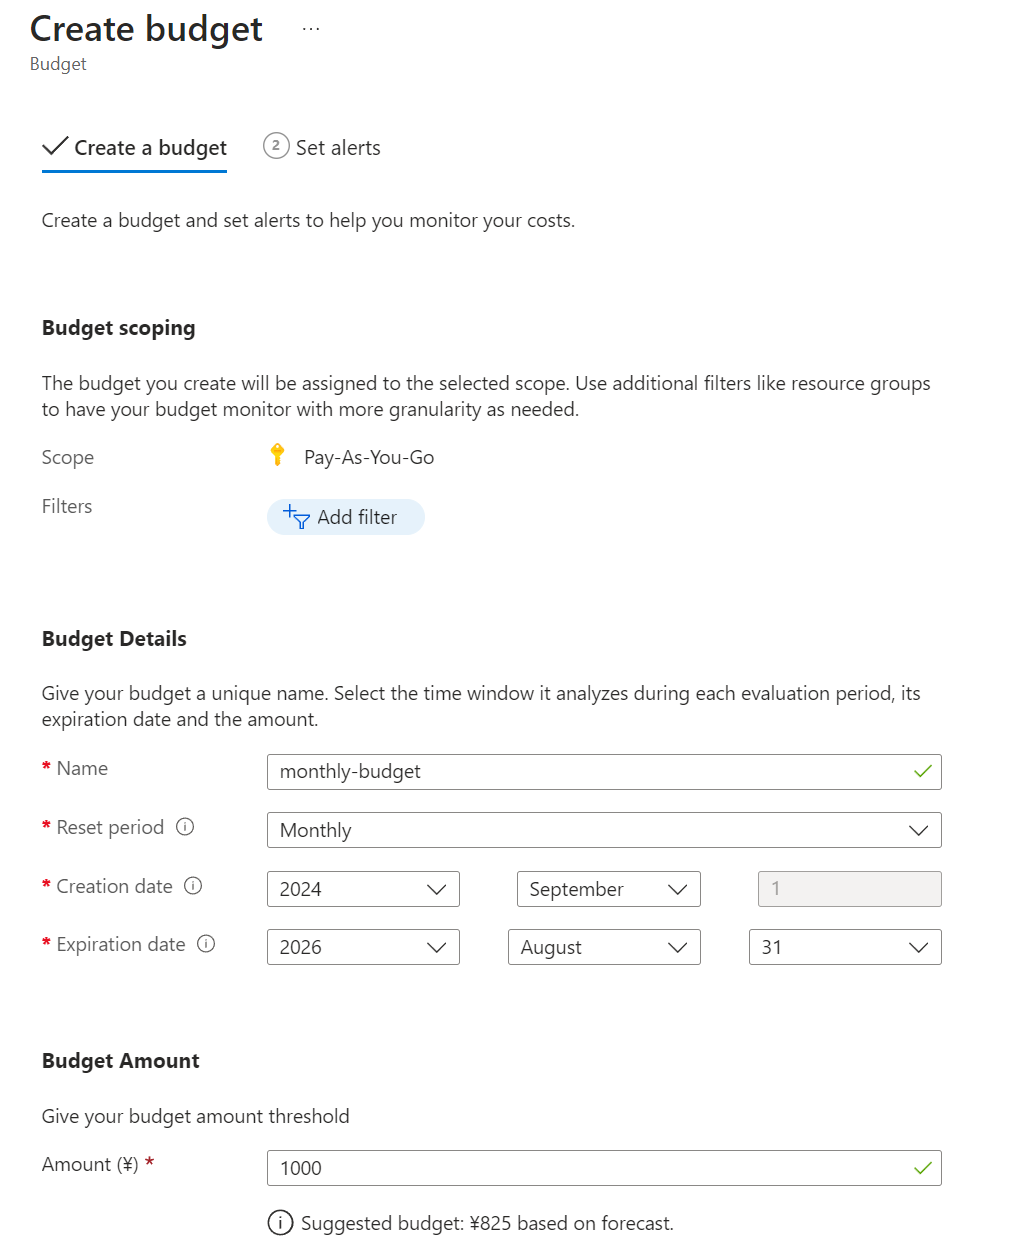
The budget creation screen will be displayed. Let’s fill in each item.
- Scope
- Specify the scope of the budget allocation
- For example, you can allocate only costs incurred in specific resource groups, but usually selecting the subscription is sufficient.
- Filters
- Specify filtering conditions
- For example, you can narrow the target by specifying specific resource types, such as “virtual machines only” or “storage only”.
- Name
- Enter a name for the budget alert
- Reset period
- Specify the period of the budget you are creating
- Creation date / Expiration date
- Specify the budget expiration date
- Budget amount
- Enter the budget amount
*The following screenshots are examples in Japanese Yen.
- Enter the budget amount

Set Alerts
After clicking “Next,” you’ll move to the “Set alerts” screen.
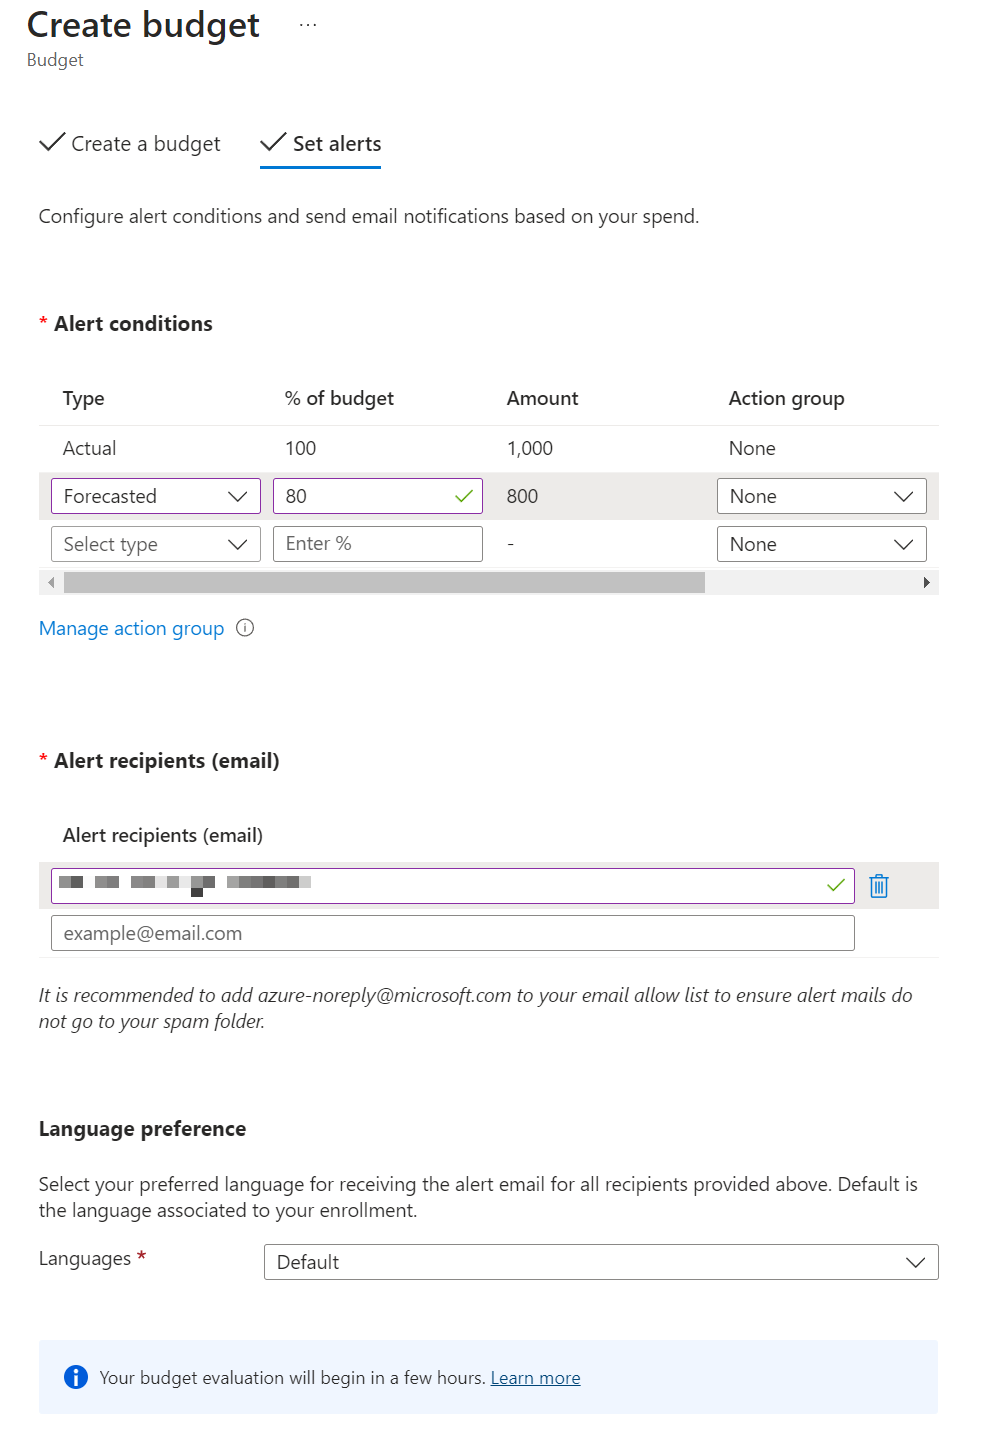
- Alert conditions
- Specify what percentage of the budget will trigger an alert
- Choose whether to base it on an “Actual” or a “Forecasted” value
- As shown in the screenshot, you can register multiple conditions in stages, such as “when over 80%”.
- You can also set up action groups
- Notify multiple recipients simultaneously when an alert occurs
- Delete a virtual machine when an alert occurs, etc.
- Alert recipients
- Enter the email address for notifications
- Language preference
- You can specify the language, but usually “Default” is fine.

When you’re finished entering your information, click Create.
When you return to the Budgets menu, you’ll see that the budget you entered has been registered.


Summary
In this article, we introduced how to set up budget alerts. It’s very easy to set up, so don’t forget to configure it when you start using Azure!
- Register budget alerts to detect cost overruns.
- Use scopes and filters to set detailed conditions for the budget management area.
- In addition to email notifications, you can perform specific actions when the budget is exceeded.

