


【AZ-900】How to Move Files in Azure Storage
Hi, I’m Makoto, a freelance engineer.
In this article, I’ll explain how to move files stored in Azure Storage to another location.
While you can upload/download and delete files and folders from the Azure portal, you can streamline these operations by using the tools and services provided. Please read to the end.
Let’s get started!
Azure Storage Explorer
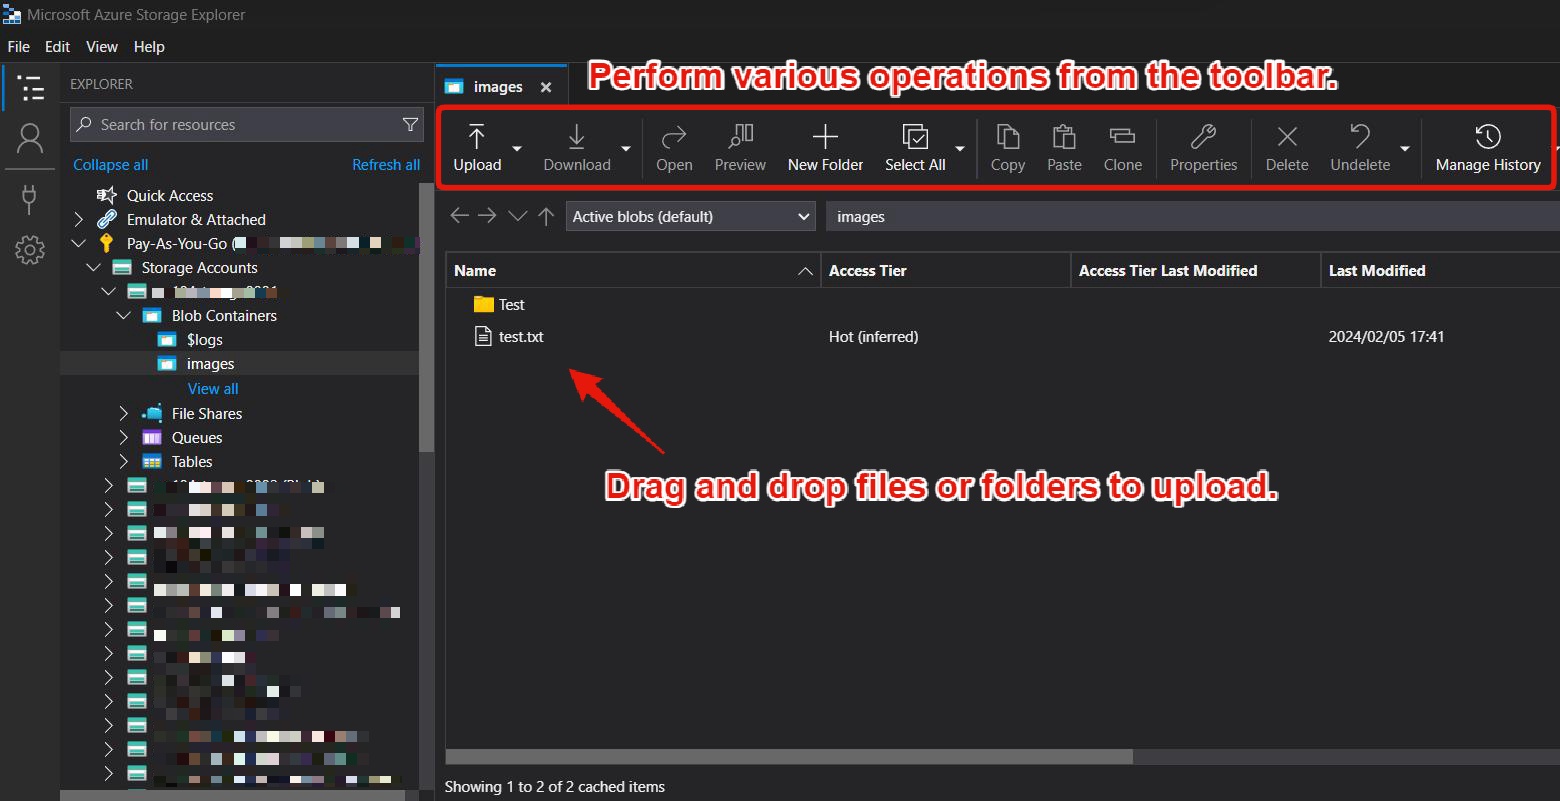
Azure Storage Explorer is a GUI tool for managing Azure Storage that can be installed on Windows, macOS, and Linux.
You can think of it as the Azure Storage version of Windows Explorer or macOS Finder.
As a GUI tool, you can use it intuitively from the toolbar, and you can also upload multiple files and folders at once by dragging and dropping them.
In the example screen below, I’ve selected the “images” container from the tree view area on the left to display a list of blobs.
Key Points:
Azure Storage Explorer is a GUI tool for managing Azure Storage, available for Windows, macOS, and Linux.
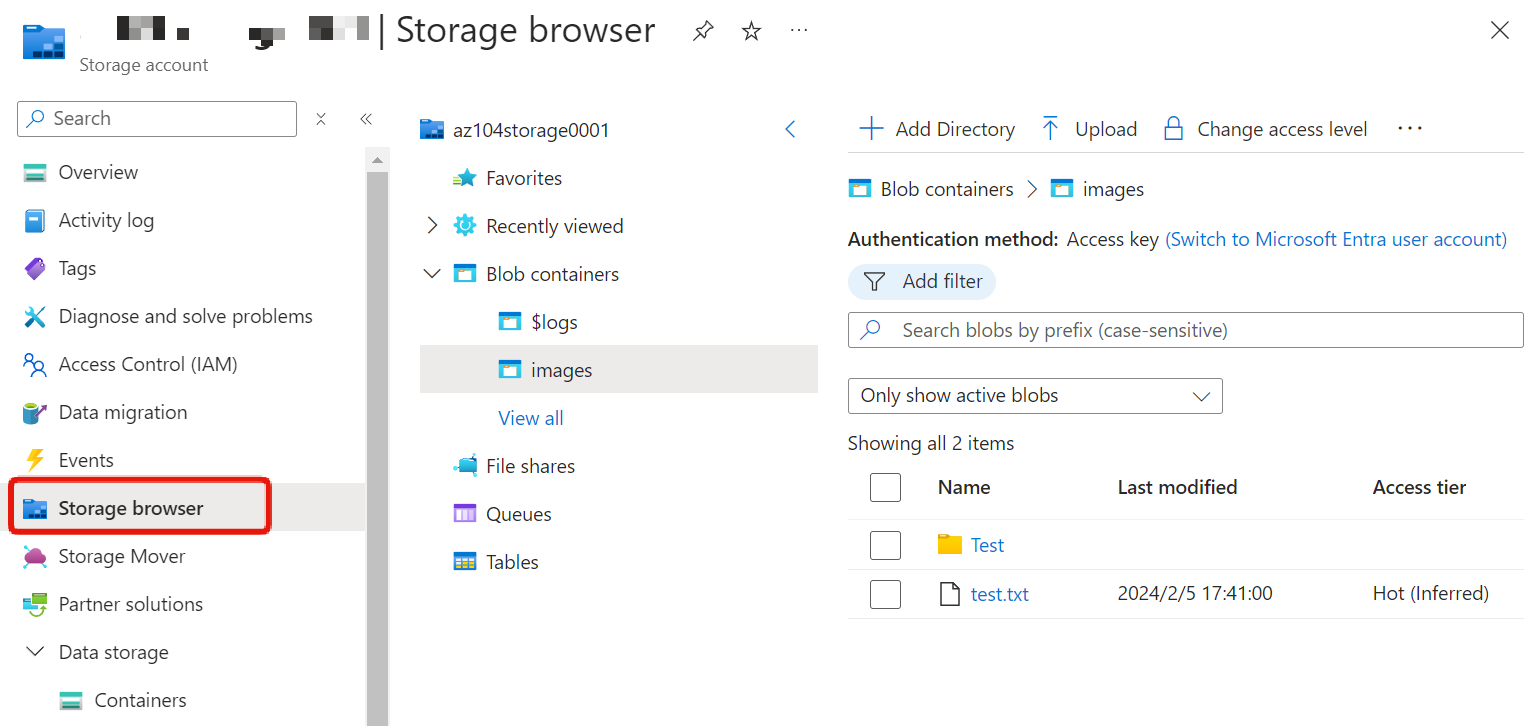
Note that you can also use a similar-looking tool from the “Storage browser” menu in the Azure portal.
AzCopy
AzCopy is a command-line tool for managing Azure Storage.
Like Azure Storage Explorer, it’s available for Windows, macOS, and Linux. It doesn’t require installation; you can use it by simply placing the executable file in a location in your path.
While you can upload/download data using the Azure CLI, AzCopy is specifically designed to copy blob and file storage data in Azure Storage and is optimized for the best performance.
Here are some examples of command execution. The basic format is azcopy [command] [arguments]. You can also specify flags such as recursive, which copies or deletes including subfolders.
# Sign in (access https://microsoft.com/devicelogin and enter the displayed authentication code)
azcopy login

To sign in, use a web browser to open the page https://microsoft.com/devicelogin and enter the code SG7AC**** to authenticate.

INFO: Logging in under the "Common" tenant. This will log the account in under its home tenant.
INFO: If you plan to use AzCopy with a B2B account (where the account's home tenant is separate from the tenant of the target storage account), please sign in under the target tenant with --tenant-id
INFO: Login succeeded.

# Get a list of Blobs in the image container (only one file: Azure Virtual Machine.png)
azcopy list "https://azstartstorage.blob.core.windows.net/image"

INFO: Authenticating to source using Azure AD
INFO: Azure Virtual Machine.png;  Content Length: 5.22 KiB

# Upload Dir1 folder
azcopy copy Dir1 "https://azstartstorage.blob.core.windows.net/image" --recursive

# Delete Dir1 folder
azcopy rm "https://azstartstorage.blob.core.windows.net/image/Dir1" --recursive
You can also synchronize with sync command, run benchmark tests with bench command, and copy from other cloud storage providers such as AWS.
While the AZ-900 exam probably won’t test you on command syntax, if you want to know more details, please see the reference.
Key Points:
AzCopy is a command-line tool for copying data between local, storage accounts, and other cloud storage providers. It’s available for Windows, macOS, and Linux.
Reference:
When you perform operations such as uploading in Azure Storage Explorer, AzCopy is used internally.
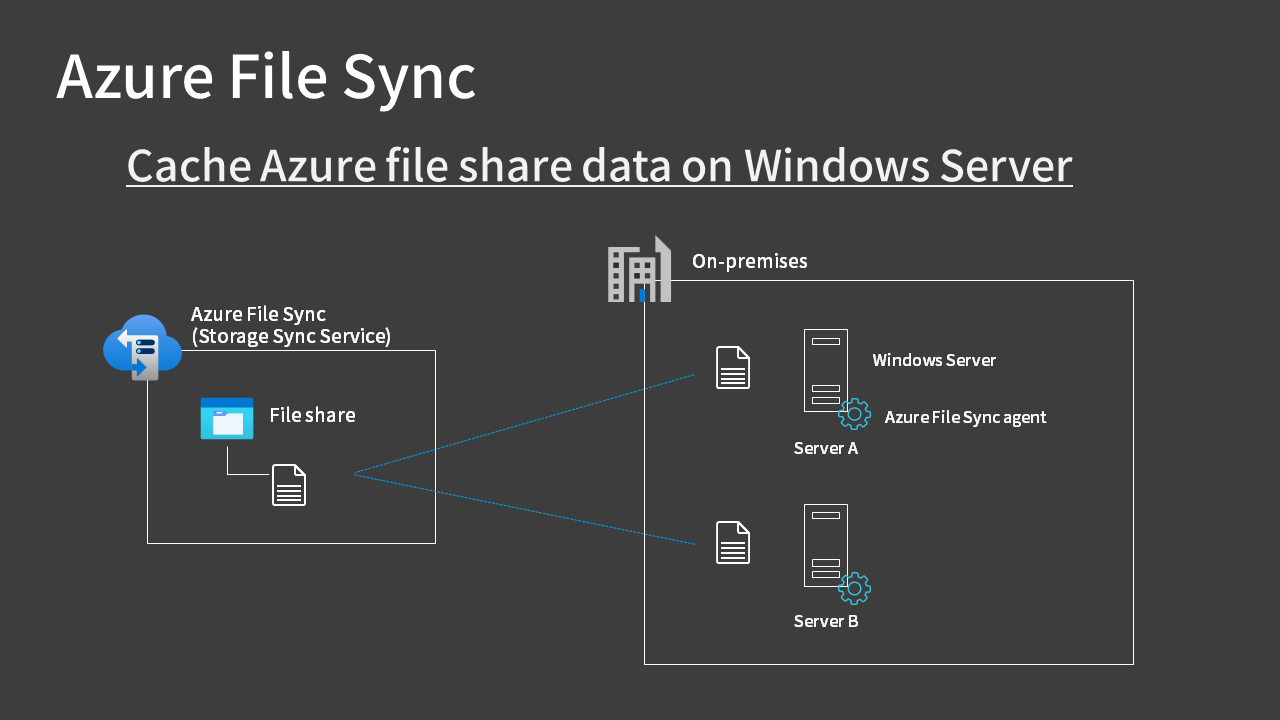
Azure File Sync
Azure File Sync is a service that allows you to cache data stored in file shares (Azure Storage’s File) on Windows Servers on-premises or elsewhere.
The mechanism is similar to popular cloud storage services such as OneDrive, Google Drive, or Dropbox.
By installing the Azure File Sync agent on a Windows Server and configuring it, files changed on on-premises Server A, for example, will be reflected in the cloud-side file share and eventually synchronized to Server B.
Azure File Sync is only supported on Windows Server (newer versions will be added in the future)
- Windows Server 2022
- Windows Server 2019
- Windows Server 2016
- Windows Server 2012 R2
By enabling the cloud tiering feature, you can keep only frequently accessed files locally.
Azure File Sync has the following uses and benefits:
- Extend on-premises file servers to the cloud
- Centrally manage in the cloud and share across multiple locations
- Backup and disaster recovery
For actual configuration steps, please see the following hands-on article:
https://az-start.com/create-azure-file-sync-hands-on/
Note that if you make changes directly to the cloud-side file share, they won’t be immediately reflected on the Windows Server. You’ll need to wait for the change detection job that runs every 24 hours.
Q: I created a file directly in my Azure file share by using SMB or in the portal. How long does it take for the file to sync to the servers in the sync group?
A: Changes made to the Azure file share by using the Azure portal or SMB are not immediately detected and replicated like changes to the server endpoint. (…)
When the change detection job determines that files have changed, Azure File Sync initiates a sync session. The change detection job is initiated every 24 hours.
Source: Frequently asked questions (FAQ) about Azure Files and Azure File Sync
Changes on the Windows Server are reflected immediately, but changes made on the cloud side take about 24 hours, so be aware of this when actually using it.
However, you can manually trigger the change detection job by using the Invoke-AzStorageSyncChangeDetection command.
Key Points:
Azure File Sync allows you to extend your on-premises file servers to the cloud.
Summary
In this article, we’ve explained the options for moving data in Azure Storage. Here’s a simple summary of each option in table form:
| Tool/Service Name | Description | Supported OS |
|---|---|---|
| Azure Storage Explorer | GUI tool for managing Azure Storage | Cross-platform |
| AzCopy | CLI tool for managing Azure Storage | Cross-platform |
| Azure File Sync | Cache of Azure file share | Windows Server only |
Remember that you can use these tools and services to copy or synchronize data as needed.
See you next time.